Pasture Poultry Husbandry- Some Lessons Learned

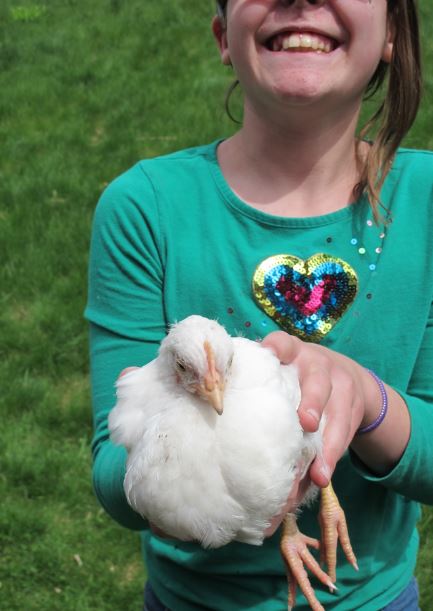
Husbandry- I always thought this was a weird way of saying poultry management.  When I started with 25 birds (16 years ago) management was easy.  Put the birds in a chicken tractor with food and water, then butcher in 10 weeks. Simple. Right?

The next year with 250 birds was a little more complicated.  I needed to figure out how to get water out to the birds in the field.  I started to buy feed in bulk. I figured it all out the hard (and expensive) way.

The third year was 750 birds.  A new set of issues.  I needed to be out in the field twice a day to check on the birds.  The brooder needed to be managed three times a day. Then we had 1500 and predators started to show up.  This was nearing a lot of problems (One which resulted in my father-in-law shooting me in the shoulder!), but I also had 7- 500 # feeders, 2 dogs in training, and was creating jobs for 2 high school students. So, I have learned a lot through trial and error, suffering through learning curves and that’s why I’m so passionate about sharing my experience. Why re-invent the wheel?  

I would like to think these tips that I provide will save you time and money.  I have a list of personal poultry celebrities that I have learned from and in which I am grateful.   If you are reading this, it is all Joel Salitin’s fault. Plus, I love talking to Mary from Hoovers Hatchery every year at Peterson’s mill and Eli Rieff makes amazing poultry processing equipment.

I also love listening to Mike Badger, who has a great pasture poultry podcast. He covers so many podcasts on different issues on poultry. If you want to learn the poultry business then you need to listen to him, but specifically on Pasture Poultry Husbandry. Just to save you some time here is his link! Mike Badger’s Podcast Link

As always, I encourage customers to call me about raising birds and sharing new ideas.  Let’s make it a great season!

What Type of Meat Bird Should I Grow in Minnesota?

Personal preference will help make your choice.  From the butcher’s point of view, I prefer Cornish Cross, but your family may want a slow growing Freedom Ranger. Regardless, it’s important to look at both options completely before making your decision.

It’s no secret, Cornish Cross is the fastest growing meat bird and is generally ready to process after 7 weeks, providing it has been given the right circumstances: right food, adequate space, water, and the right management practices. The Cornish Cross is more genetically modified.

Some however may prefer Freedom Rangers because of their slow growth, dark meat, and being less genetically modified. They are better growing on pasture with their breed qualities, they peck more, move around more, etc., and they do contain a lot more fat. They are ready after 10-12 weeks.

I recently attended the Sustainable Farm Association annual conference.  One of the presentations was by Randy Kleinman from Seelye Brook Farms located in Oak Grove, Minnesota. Randy completed a two-year study comparing Cornish Cross and Freedom Rangers raised on pasture.  There is so much information in this one study. 

If you are a small poultry farmer in Minnesota, this information will be very valuable in helping you make the decisions on your farm. With his permission to share the study, I would recommend anyone growing meat poultry in Minnesota to take a look! https://www.seelyebrookfarms.com/sadg-grant

Easy Brooder- The Stock Tank

This type of brooder is easy to manage, and it avoids some stupid pit falls. They are great for controlling climate, and the tank provides protection for the chicks.  Caring for chicks is easy and keeping a tank clean and freshly bedded only takes a few minutes a day. 

Managing the brooder for success is easiest with a stock tank purchased at your local farm supply store.  Stock tanks are super durable.  Unlike other brooding methods, if the floor gets wet your chicks are safe.  Cats, dogs and wildlife have a very difficult time getting to your chicks.  Put some chicken wire or hardware cloth on top and your heat lamps have another fail safe to prevent fires.

Climate control is easy.  A red heat lamp on one-end gives enough heat for 50 chicks to stay warm and enough room to run around.  Always double clamp heat lamps.  They are prone to having someone or something knocking them over and starting a fire. Your family’s safety should always come first.  Install them above your chicken wire, clamp them to the side of the stock tank and buy a C clamp to attach the lamp to another spot on the tank. When the temp dips below 40 you can easily use a piece of cardboard to regulate the heat in the brooder.  Broilers are very hardy.  At three weeks of age these chicks can withstand freezing, and should be removed from the brooder.

The day before the chicks arrive the brooder should be set up.  Turn on your heat lamps.  Make sure the water is room temperature.  If you are not ready when the chicks arrive, let them sit in their box for the day.  They will be just fine! Chicks can survive three days in the delivery box without feed or water.

A layer of medium to large wood shavings should be put down in the brooder.  Then a couple of sheets of newspaper should be put on top of the shavings. The layer of newspaper helps manage the chicks so they drink water first, and then 4 to 12 hours later you can introduce feed and chick grit.  The farmer also reduces the risk of the chicks eating wood shavings before they are introduced to feed.  *Our trick to introduce food is to put colored marbles in the feeders so they will peck at them and find it.

Put a small piece of wood on the bottom for the gallon waterer, so it does not leak.  Dampness kills chicks.  The piece of wood makes it easy to level the water.  Putting three, one-quart size feeders in the brooder is adequate for the first seven to fourteen days.

Cleaning the tank is super easy.  You will need a garbage can and a large feed scoop. The chicks should not be removed.  Do not let anyone hold your chicks as tempting as it is; they will die because they will be crushed by your hands, regardless of how gentle you are. Remove the water and feed.  Clean the shavings and newspaper with the scoop and then return the piece of wood for the water. Next, add about 2 inches of shavings.  Place the water on the level piece of wood. Put the feeders back and sprinkle chick grit on the shavings.

The stock tank is a clean, safe, temporary home for your baby chicks, but as a brooder it is just meant to get them big enough to be outside.  They can be removed from here in as early as nine days.   They should be removed by day 18.  After 18 days it becomes very difficult to keep clean!  At the end of brooding, the tank can be washed out with a garden hose and place upside down until next time. Good luck!

Chicks 101

Broiler Chicken Basics

Success of a flock is dependent on a great start for the chicks. These basics below will help to focus on starting your flock out on the right foot so your flock can perform and achieve their full potential. Regardless of the breed, always make sure your pens are clean and dry! When your hatchlings arrive, they will need water first and foremost. Dip their beaks in clean, room temperature water to get them acclimated and hydrated before giving them food.

Temperature Guidelines

Pre-heat brooder 24-48 hours prior to arrival

Brooder Temperature 98◦decreasing by 5◦ every week (Meat birds can with stand 32◦ in 3 weeks)

One Red 250W heat bulb (helps prevent cannibalism) per 50 chicks

Chick Guard draft shield (14 inches high) keeps birds from piling

Water Requirements

Plastic gallon founts work best 2-3 per 50 chicks

Available 24 hours – use marbles in deeper dishes to prevent drowning

Refresh 2-3 times a day

Feed Requirements

Start with egg flats

2 linear feet of space for 50 chicks

Grower feed 22% first 3 days full feed

Grower feed 22% day 3 to day 21 -12 hours a day

Grower feed 22% day 21 to finish 24 hours a day

Provide chick grit

Lighting

250 W Red Bulb approximately 12-18” off the floor

Broiler Space

1.3 to 2.4 Feet bird during grow out

Litter: Medium to Large wood shavings are best

Possums, Raccoons and Minks, Oh My!

If you have meat birds that haven’t been processed or are overwintering layers please be advised: predators filling up on their last meal before hibernation have accounted for massive losses. Possums, racoons, and minks, but don’t forget skunks. Whether it is ducks or prize chickens they don’t care!

Here is a list of helpful suggestions to protect your Honeys!

  1. Keep them locked up, day and night.
  2. Barn-lime your coop exterior or barn’s interior. Note: This does NOT affect your birds or their feet.
  3. Buy a Dog-Proof Trap (at Fleet Farm) if you don’t have one already.
  4. If you have a dog, brush it and throw the excess hair around the coop to emit that smell that they fear.
  5. Raccoons hate country music! Don’t play it all the time, but occasionally seems to help.